
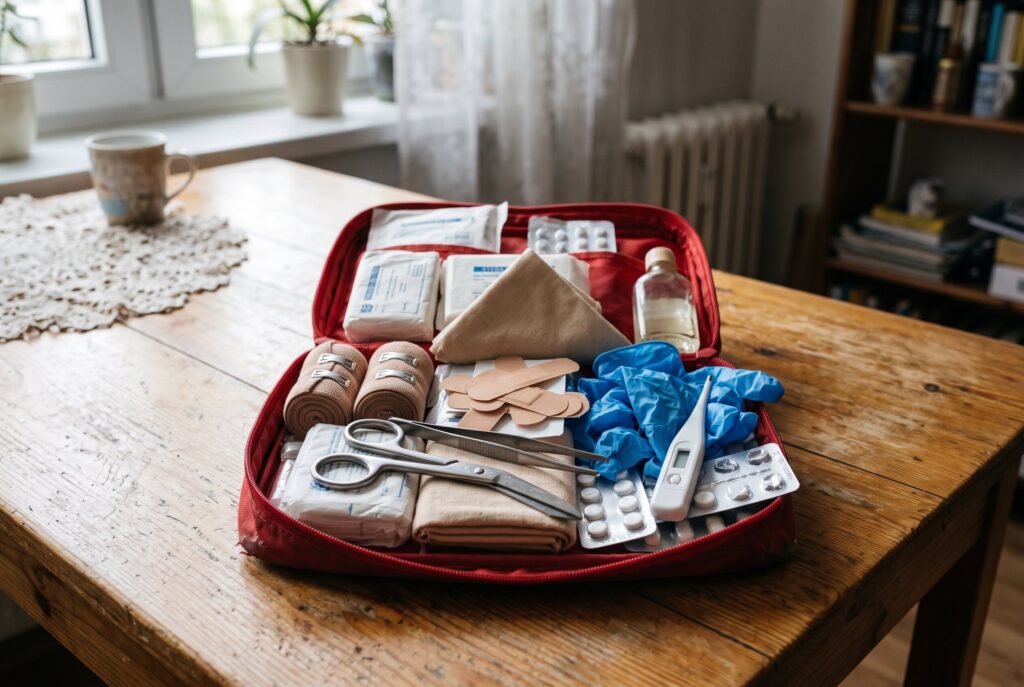
Take a moment to look inside your home first aid kit (if you have one at all). What’s in it? A few plasters, an opened blister strip of headache tablets and a syrup that went out of date before your child started school? 😉 For an ordinary week that’s enough, because the pharmacy is round the corner and the local clinic is open. In a crisis it’s different. Hospitals will be overloaded, and anything that isn’t life-threatening you’ll have to deal with yourself.1
I’ve already written about a basic first aid kit in the post about a blackout in Poland and in the one about the bug-out bag. Here I’m going a step further: how a trail kit differs from a home kit for a longer crisis, what to keep in them, what to add in winter and when there are children at home, how to store them and why, without a bit of practice, even the best first aid kit won’t be much use. You won’t find medicine doses here, or advice on how to recognise an illness. That’s what the leaflet and your doctor are for.
A trail kit and a home kit are two different things
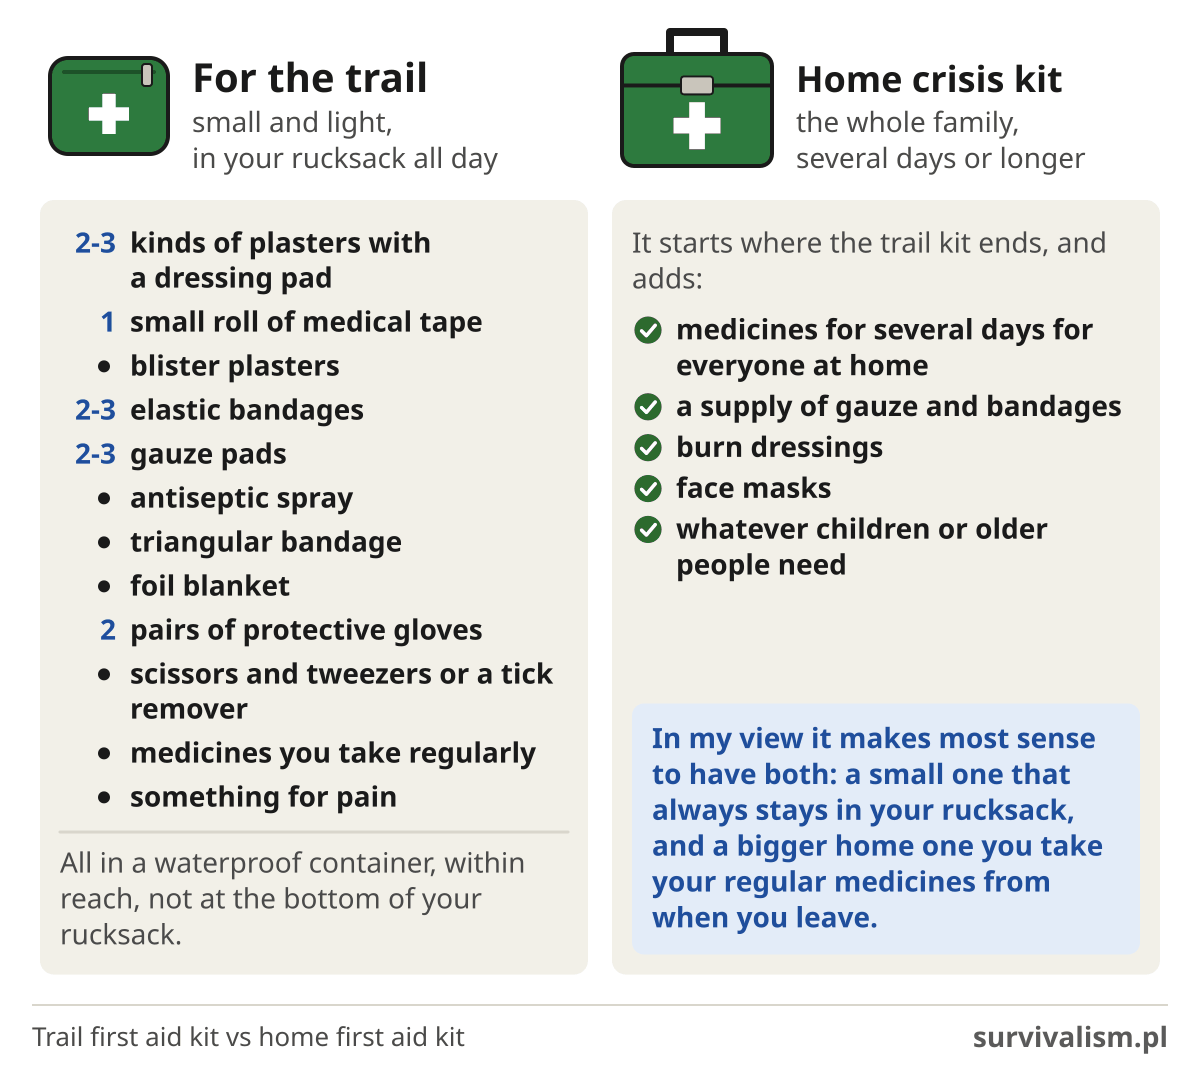
A trail first aid kit is there to help you deal with a minor injury and get safely to where someone can help you. It has to be small and light, because you carry it in your rucksack all day, in the rain and in the heat. A home first aid kit for a crisis has a different job. It should let the whole family get through several days, maybe longer, when there’s no way to get to a doctor. So it can be bigger and heavier, and above all it holds a supply of medicines for everyone in the household.
For a mountain hike a basic set is enough: 2-3 kinds of plasters with a dressing pad, one small roll of medical tape, blister plasters, 2-3 elastic bandages, 2-3 gauze pads, an antiseptic spray, a triangular bandage, a foil blanket (NRC foil), 2 pairs of protective gloves, scissors and tweezers or a tick remover.2 Add the medicines you take regularly and something for pain.3 Pack the lot in a sturdy, waterproof container and keep it where you can reach it, not at the very bottom of your rucksack.4
If you don’t want to put everything together yourself, buy a ready-made first aid kit Amazon store, affiliate link, opens in a new tab and add whatever is missing. Ready-made kits most often have no disinfectant and no medicines.
 Amazon store, affiliate link, opens in a new tab
The same small kit will come in handy on your first night in the woods and on any trip where the nearest pharmacy is a long way off. The home kit starts where the trail kit ends. It holds several days’ worth of medicines for everyone in the household, things you don’t take on a day trip (a supply of gauze and bandages, burn dressings, face masks), and whatever children or older people need. In my view it makes most sense to have both: a small one that always stays in your rucksack, and a bigger home one you take your regular medicines from when you leave the house.
What should be in a first aid kit?
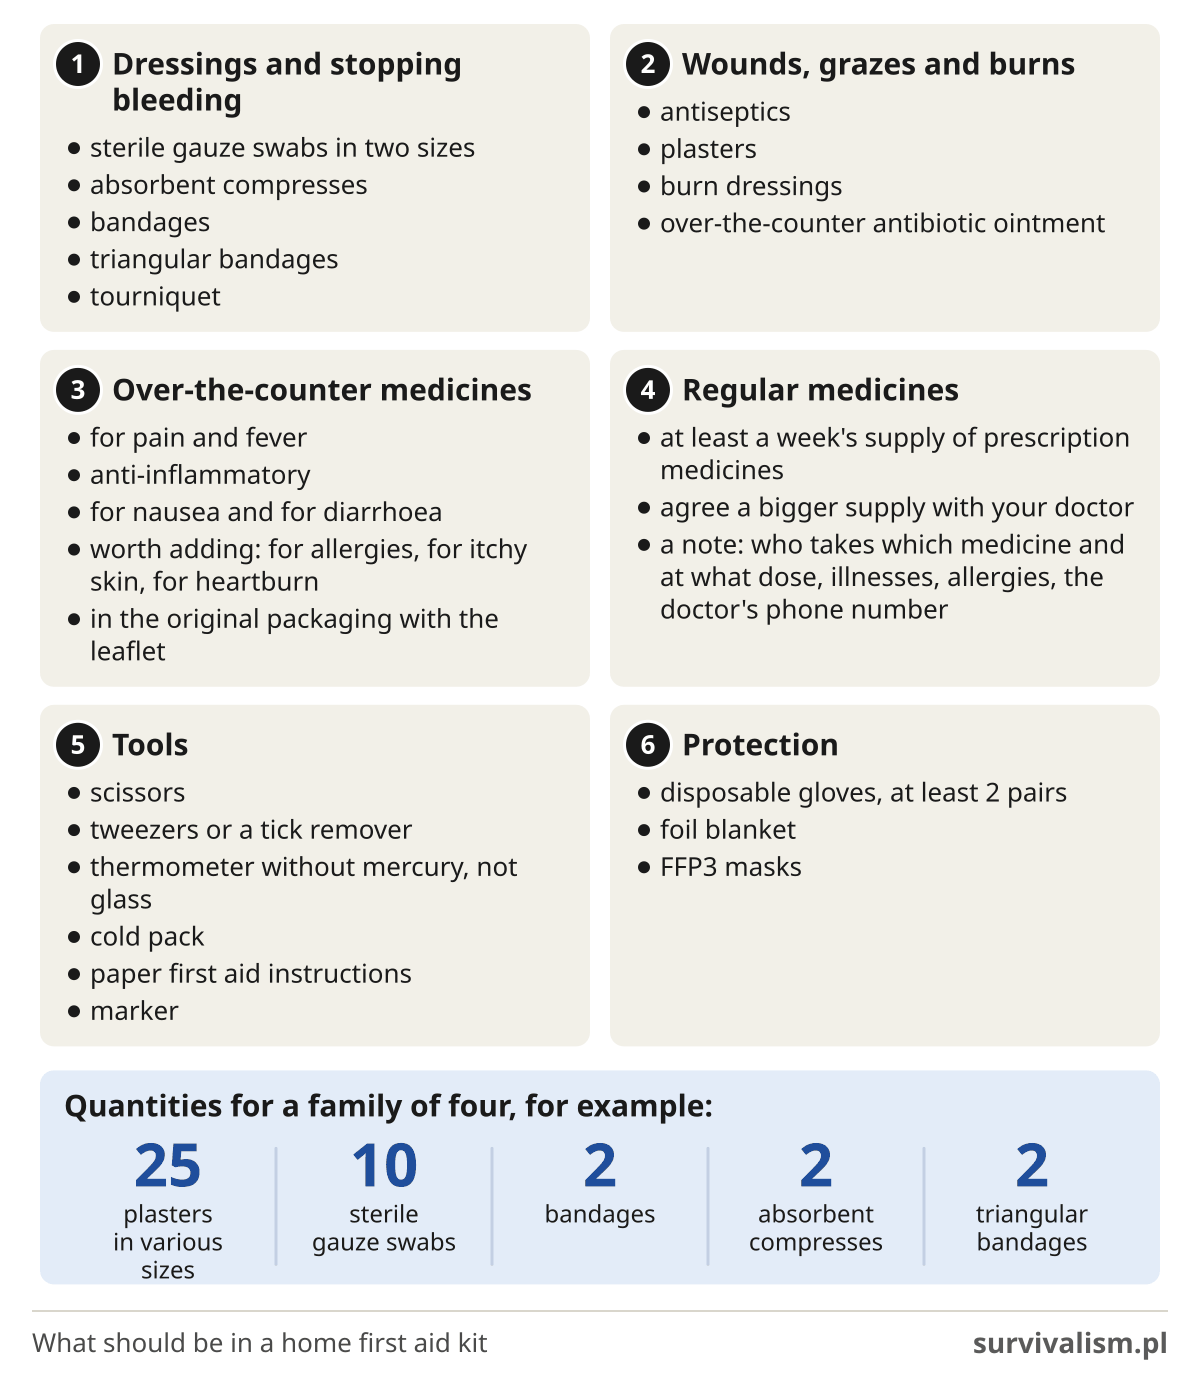
Below I’ve broken the contents of a home first aid kit down into groups. It’s my suggestion, not a closed list. For a good start: medicines taken regularly, painkillers, anti-inflammatories, medicines for nausea and for diarrhoea, gauze, bandages, burn dressings, disposable gloves, antiseptics, a tourniquet, a thermometer, scissors, FFP3 masks and a thermal foil blanket.5 Further down I split this into groups and add what’s worth knowing about each of them.
Dressings and stopping bleeding
The basics are sterile gauze swabs in two sizes, absorbent compresses, bandages and triangular bandages. To give you an idea of quantities: for a family of four that’s, for example, 25 plasters in various sizes, 10 sterile gauze swabs, 2 bandages, 2 absorbent compresses and 2 triangular bandages.6
The most important thing, though, is that you know what to do with all this when blood is really pouring out. Heavy bleeding can kill within minutes, so your first move is pressure. You put on a pressure dressing made from a bandage, a piece of fabric or a scarf, and if you can’t put one on, you press on the wound with your hand or with a piece of fabric until the bleeding stops or the paramedics arrive.1 There’s no magic number of minutes here.
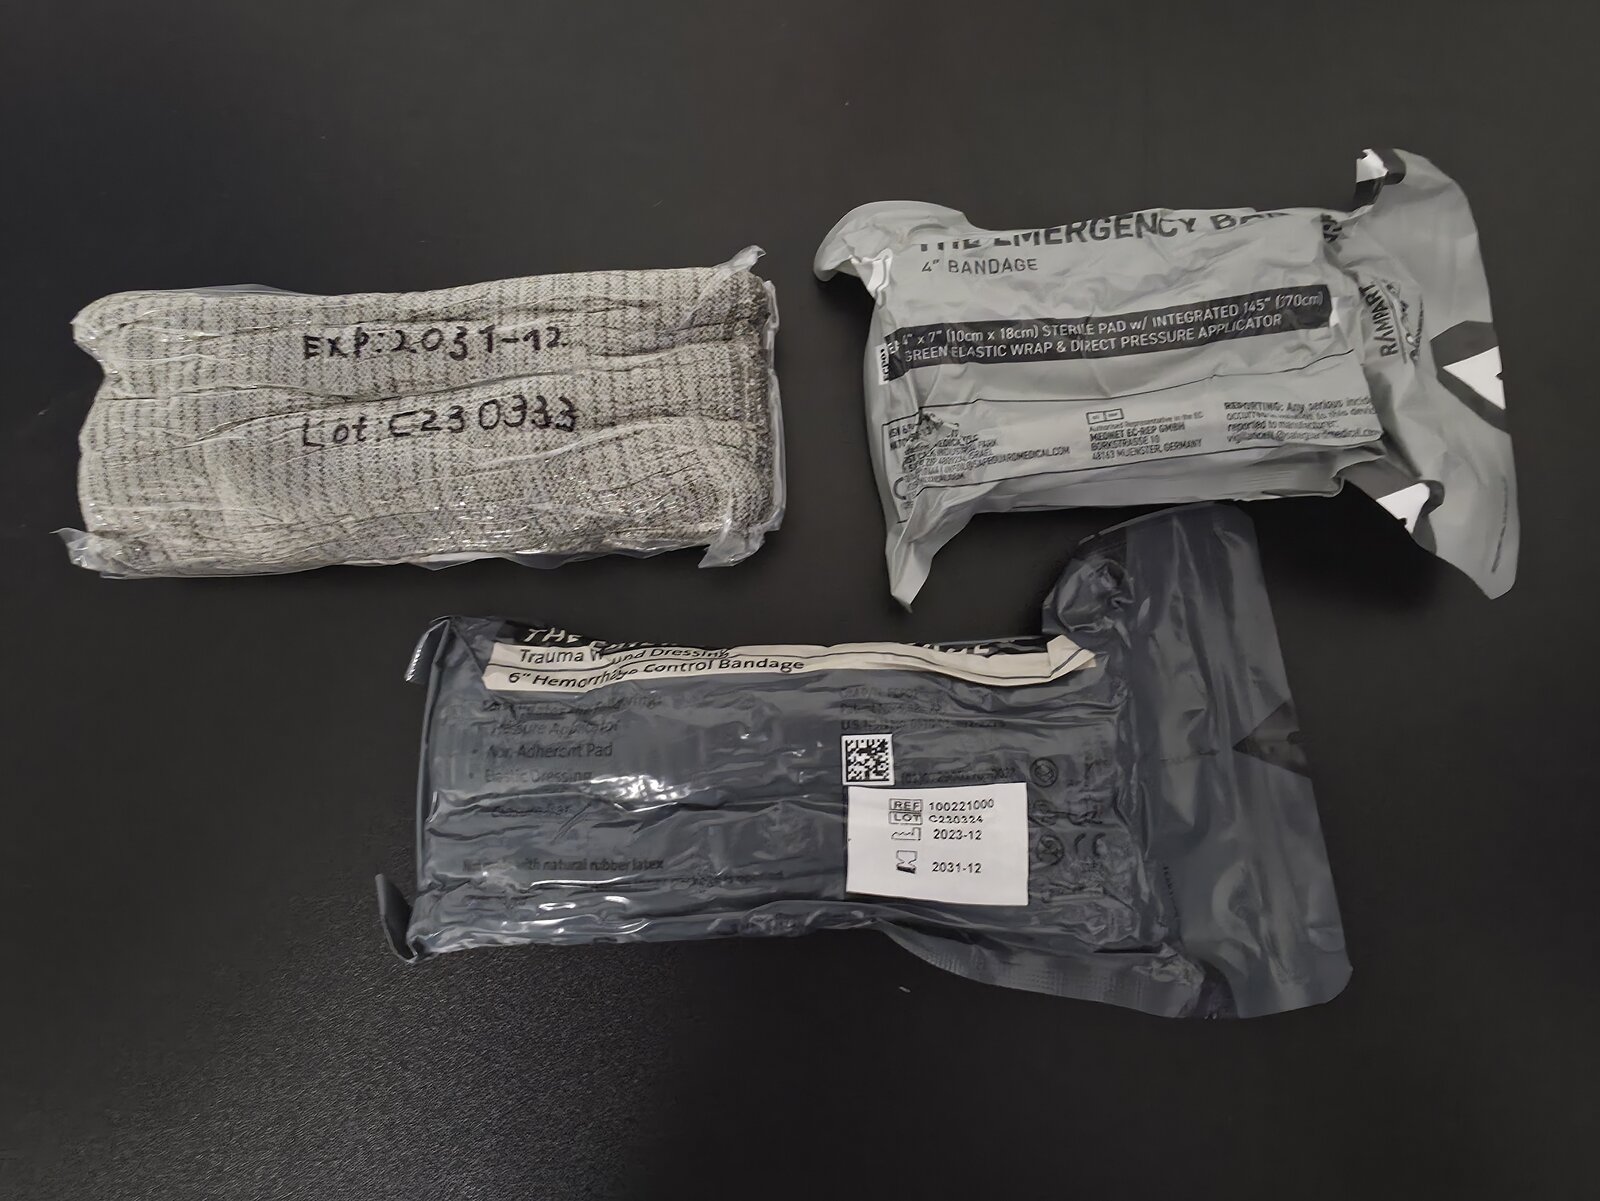
When is bleeding life-threatening? When there’s roughly as much blood as half a drinks can holds (less for a small child), or when blood flows non-stop or spurts. Put a dressing on the wound, ideally a haemostatic one if you have it, and press hard, without letting up. If blood soaks through the gauze, don’t take it off, at most put another one on top. When your strength gives out, have someone take over from you.7
With bleeding like that, don’t waste time cleaning the wound. The pressure has to be continuous, so leave rinsing for later. I describe it below, under minor wounds. Don’t pull out an object stuck in the wound either, even if it looks dirty, because it may be acting like a plug and slowing the bleeding. In that case press on both sides of the object, not on it.8
A tourniquet goes on above the wound, on the upper arm or thigh, when bleeding from a limb won’t stop, and you write down the time it went on. One more thing. Don’t loosen or remove a tourniquet once it’s on, that’s a job for paramedics and doctors.9 That’s why you should keep a marker in the kit next to the tourniquet, because the time has to be written somewhere, and under stress it’s easy to forget.
And what if help doesn’t come for many hours? A tourniquet left on too long destroys the limb, so the temptation to loosen it every now and then is understandable. But loosening it like that doesn’t save the arm or leg, and each time it lets out another portion of blood, until the casualty bleeds to death bit by bit. Up to 2 hours a tourniquet is considered safe, up to about 6 hours probably too, although nobody has studied that limit precisely. The longer it stays on, the greater the tissue damage and the more dangerous the complications once it comes off.10 The answer is to convert the tourniquet to a pressure dressing, ideally before 2 hours are up, with a second tourniquet put on loosely in case the bleeding comes back. But that’s something they teach on courses. In the TCCC guidelines, the military’s first aid for the battlefield, changed in 2026, a trained soldier may assess a tourniquet within 2 hours, and only medics may convert it later.11 Without that kind of training the tourniquet stays where it is, because a limb can sometimes be saved in hospital, but a life can’t be saved after bleeding out.
Wounds, grazes and burns
Rinse a minor wound first with clean water from a bottle or the tap, or with sterile wipes, dry it with a gauze swab and only then put on a plaster or a sterile dressing. If you wrap it in a bandage, check every 10 minutes that it isn’t too tight (an ordinary bandage on a minor wound should let blood through to the fingers, a tourniquet on heavy bleeding should stop it). Press the skin below the bandage for 5 seconds until it goes pale, and see whether the colour comes back within 2 seconds.12 You can add sterile saline to your trail kit.3
For minor wounds and grazes I recommend an antibiotic ointment you can buy without a prescription. I’ve tested it, it works brilliantly, and wounds heal quickly and without any “festering”. A deep wound or a puncture wound, though, is a job for a doctor.
Cool a burn as soon as possible under cool running water for 20 minutes. Do it straight away, and if that wasn’t possible, later, as long as it’s within 3 hours of the burn. Don’t put cream, oil or butter on it (save the butter for your sandwiches ;)) and don’t cover it with a plaster. Cover the cooled burn loosely with cling film, but don’t wrap it all the way round. A very large or deep burn, one on the face or in the genital area, or one caused by chemicals or electricity is a matter for the hospital, and straight away.13
You’ll also need a doctor for a burn on the hand and for any burn larger than a hand. When you cool a large area of skin, especially on a child, be careful not to let them get too cold.14
Over-the-counter medicines
Here I deliberately don’t give any names or doses. It’s enough for your home kit to have something for pain and fever, something anti-inflammatory, something for nausea and something for diarrhoea.5 It’s worth adding something for allergies, something to soothe itchy skin and, if you’re prone to heartburn, something for that too.4
Keep medicines in their original packaging together with the leaflet, and don’t throw away the part of the box with the expiry date on it.15 A loose blister strip without its box will tell you nothing after six months: not what it is, not what it’s for, and not until when it’s fit to use.
Medicines your household takes regularly
This is the most personal part of the kit and no ready-made set includes it. Keep a supply of all the prescription medicines you and your family take, enough for at least a week.16 For a longer crisis, agree a bigger supply with your doctor, because they write the prescription and will tell you how much of that medicine it makes sense to keep at home.
So that the supply doesn’t expire in a drawer, use the oldest pack first and buy new ones before the last one runs out. Put a note next to the medicines: who takes which medicine and at what dose, what illnesses they have, what they’re allergic to, plus the doctor’s phone number. A list like that will help anyone who’s helping you, because under stress it’s easy to mix things up.17
Medicines that need a fridge, such as insulin, and electrically powered medical equipment I’ve covered separately in the post about the blackout.
Tools
Scissors and tweezers or a tick remover are the basics, at home and on the trail.2 Add a thermometer Amazon store, affiliate link, opens in a new tab, ideally mercury-free and not glass, a cold pack and paper first aid instructions.6 Put a cold compress on a bruise for no more than 20 minutes and never directly on the skin, only through a thin, dry towel, and apply the next one after a break of at least 20 minutes.18
For the instructions, the first aid chapter of the Polish government’s Safety guide in PDF (in Polish) is enough. Print pages 41-44 and put them in the kit. In a crisis your phone may be flat or have no signal, but a sheet of paper always works. And one more thing: a marker, which will come in handy for writing down when a tourniquet went on, or who got which medicine and when.
Protection: gloves and a foil blanket
Put disposable gloves on before you touch someone else’s wound. Take at least two pairs. If you don’t have gloves, pull a plastic bag over your hand or ask the injured person to press on the wound with their own hand, if they can.7
You already know the foil blanket Amazon store, affiliate link, opens in a new tab (NRC foil) from the bug-out bag. It’s light, cheap and takes up little space. You cover the casualty with it, because after an injury people lose heat faster. On the trail the same foil will serve you as a sheet to keep the wind off, so keep it in your rucksack whatever the season.2
What to add in winter?
In winter, on top of injuries there’s the cold, on the trail and at home without heating. So it’s worth knowing what to add to the kit and what to do when someone has already got badly chilled.
Hypothermia is when body temperature drops below 35 °C. Get a chilled person to a sheltered place as quickly as possible, take off their wet clothes and wrap them in a blanket, a sleeping bag or a dry towel so that their head is covered too. If they’re fully conscious, give them a warm drink without alcohol and something sweet, chocolate for example. Don’t put them in a hot bath and don’t rub their arms or legs. Older people who live alone in cold homes are especially at risk, so if a crisis hits during a hard frost, check on your neighbours.19
Give the warm drink carefully, in small sips.20 Don’t rub frostbitten fingers either, and don’t warm them by a fire, on a radiator or with a hot-water bottle. Warm them in warm, but not hot, water, dry them and put on a light gauze dressing.21
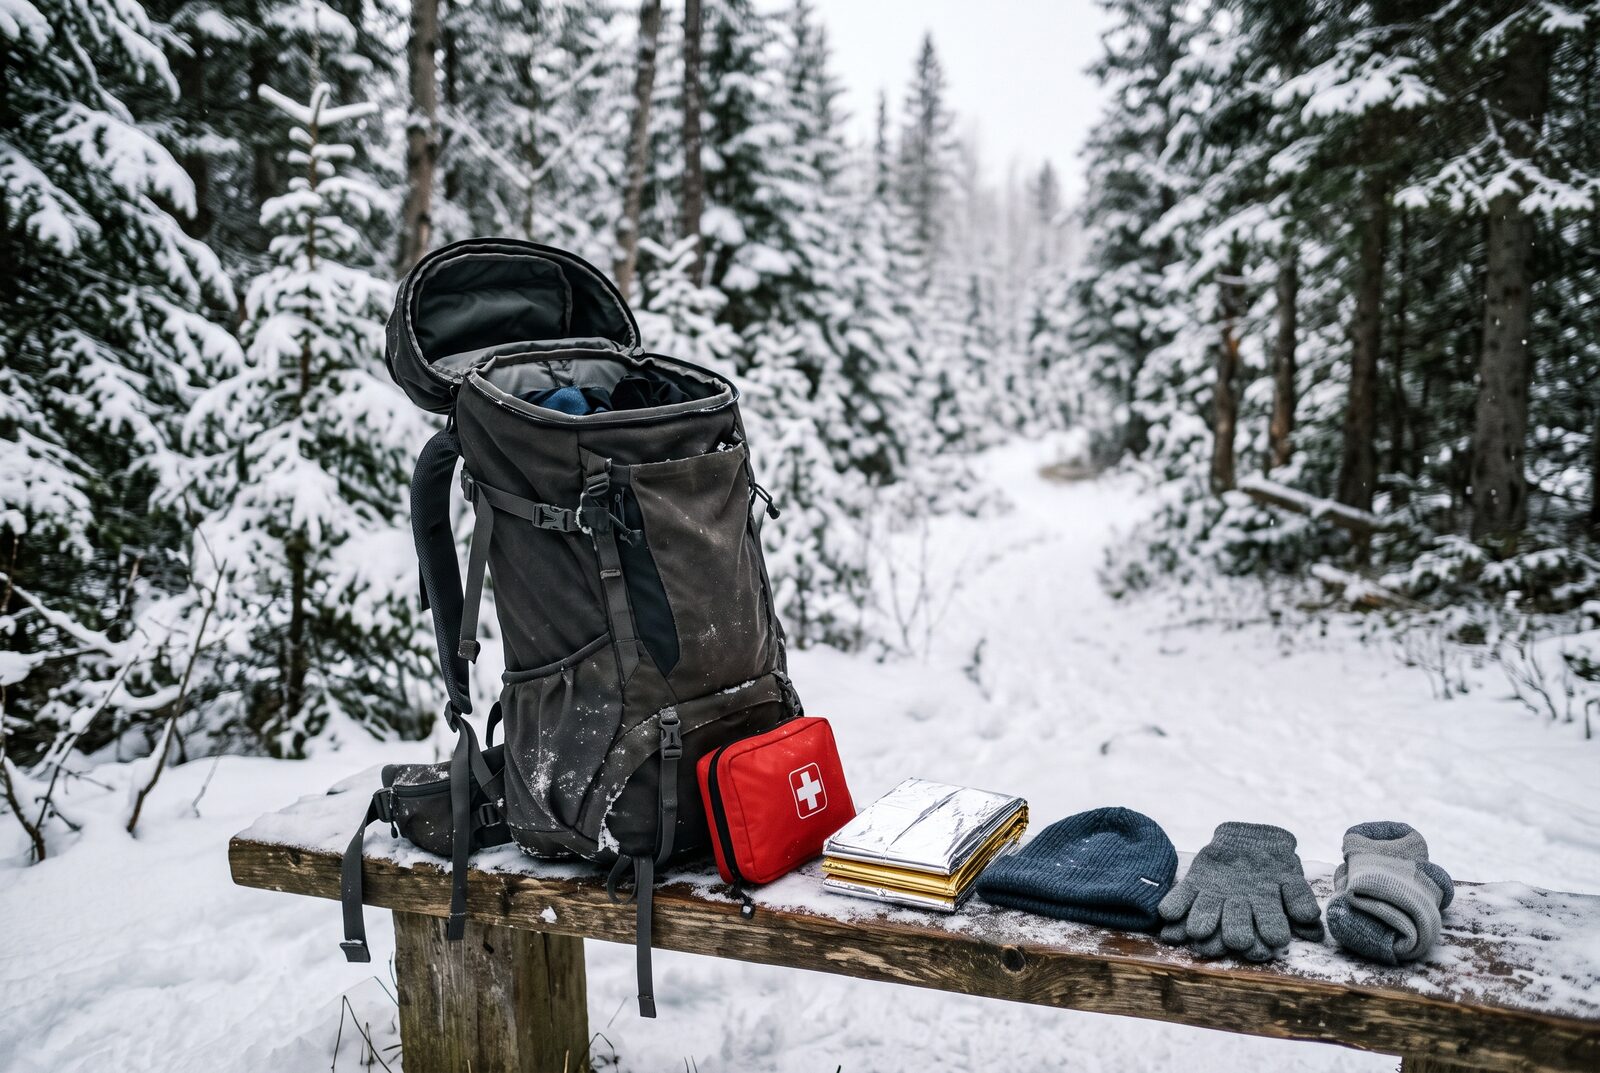
So add a second foil blanket to your winter kit, and keep a hat, gloves and spare socks in your rucksack, which should be there whatever the season anyway.2 At home, for a winter crisis, get a flask Amazon store, affiliate link, opens in a new tab ready and something sweet, because when someone is chilled, a warm drink and sugar will be needed straight away.
A first aid kit when there are children at home
A child isn’t a small adult, and that goes for health and medicines too. Buy pain, fever and allergy medicines in children’s versions, with a syringe or a measuring cup for measuring them out.4
If your child has asthma, ask a pharmacist or a doctor first about an anti-inflammatory medicine for them. With diarrhoea a child loses water and salts, and in small children the signs of dehydration are hard to spot, so always keep sachets of oral rehydration solution in stock and make them up exactly as the instructions on the pack say. Add sunscreen with an SPF of at least 30 and an antiseptic cream for bites, cuts and blisters.22
Some anti-diarrhoea medicines aren’t suitable for children under 12, so always check the leaflet. If a child under 5 shows signs of dehydration, for example fewer wet nappies than usual, you’ll have to get medical help.23 You’ll find more about the symptoms in the post on how to recognise dehydration and how to prevent it.
Plasters with a favourite cartoon character don’t heal any faster, but they’re a lot easier to stick on a crying child 😉
How should you store a first aid kit?
Even the best-stocked first aid kit won’t do much good if the medicines in it quietly go off and the dates pass before anyone looks inside.
Temperature, moisture and sunlight
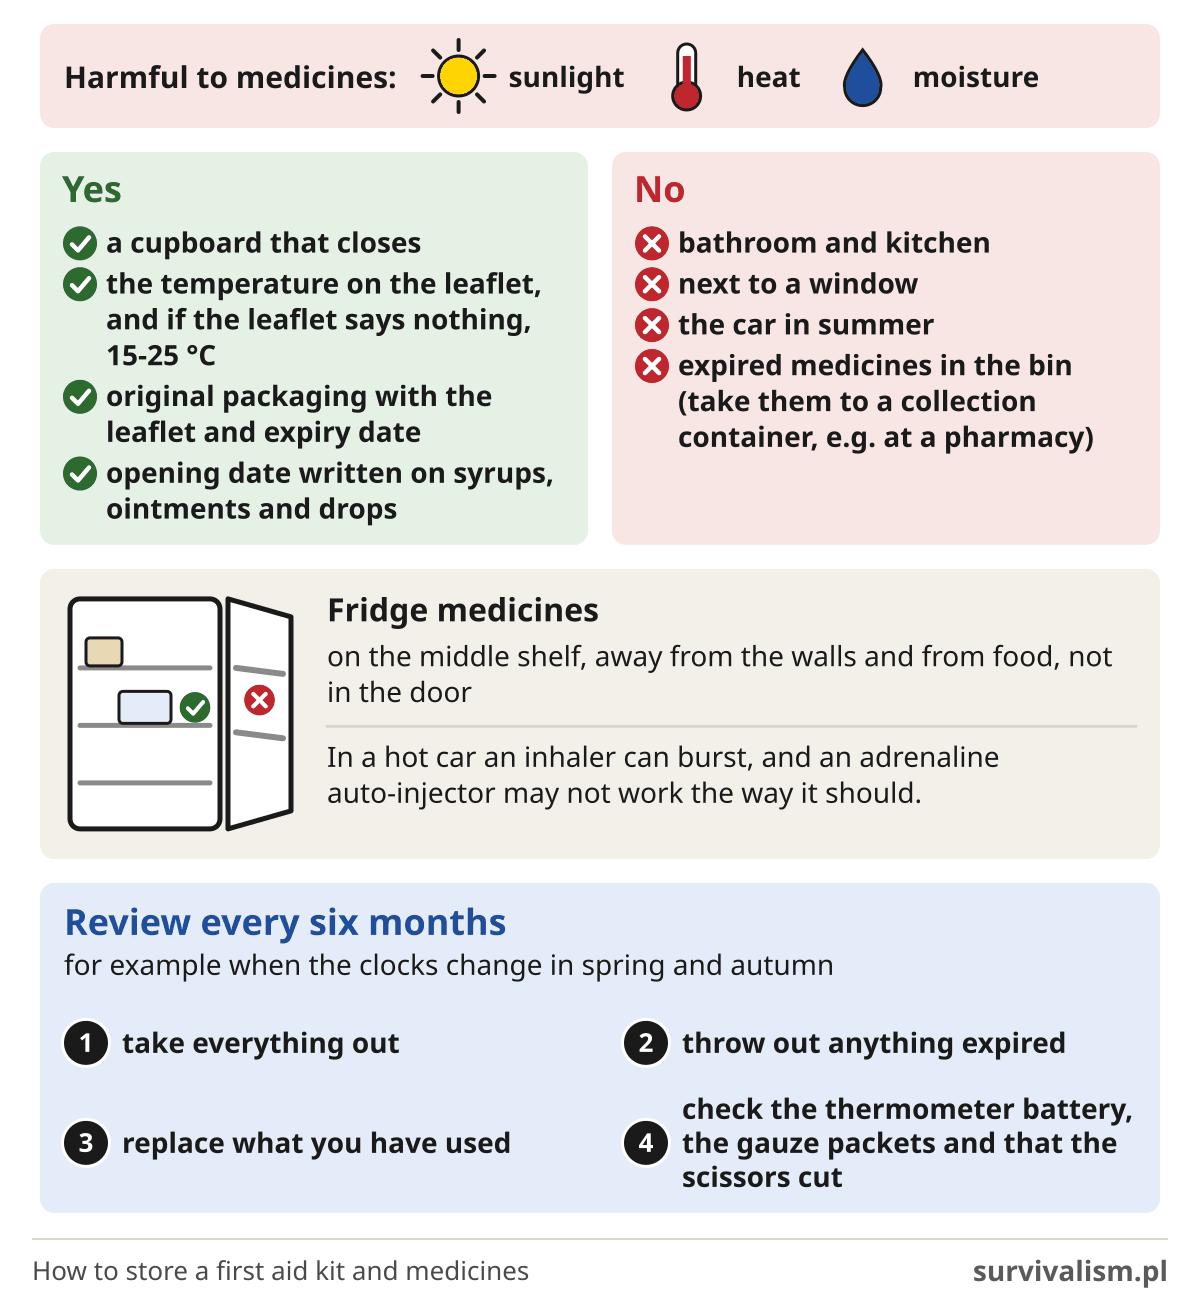
Store medicines the way the leaflet says, and when it says nothing about it, at room temperature, that is from 15 to 25 °C. Sunlight, high temperatures and moisture harm medicines, so don’t keep your home kit in the bathroom or the kitchen and don’t put it by a window. A cupboard that closes is best. Put medicines that need a fridge on the middle shelf, away from the walls and from food, not in the door.15
Don’t leave the kit in the car in summer. An inhaler in a hot boot can burst, and an adrenaline auto-injector in the heat may not work as it should, or may deliver less of the medicine.24
Expiry dates and reviews
Write the opening date on the pack of a syrup, ointment or drops, because the shelf life after opening is often much shorter than for an unopened medicine. Don’t throw expired medicines in the bin, take them to a specially marked collection container instead. You’ll find such containers in pharmacies, among other places.15
Go through the whole kit once every six months.16 Take everything out, throw away anything expired, replace what you’ve used, and check that things still work: that the thermometer has a working battery, that the gauze packets aren’t torn, that the scissors cut. It’s easy to forget, so put the review in your calendar, for example for when the clocks change in spring and autumn.
A first aid kit isn’t everything
The best-equipped first aid kit won’t help if, under stress, you don’t know what to take out of it and how to use it. That’s why every now and then you should go through what’s in it, so you know what it holds and what each thing is for.3 In my view one first aid course will give you more than the most expensive kit, because it’s better to put on a pressure dressing or a tourniquet once in practice than for the first time in your life on someone close to you.
Also show the people you live with where the kit is and what they’ll find in it. In a crisis you might be the one who needs help, and then it helps if someone else knows where to look for the gauze and the tourniquet.
There is one thing for your kit that you can’t make yourself: antibiotics. The idea going around online is that, if it comes to it, you’ll grow penicillin from the mould on a slice of bread. You won’t. The man who discovered penicillin couldn’t turn it into a medicine himself, it took a team at Oxford to do that, and their first patient still died because the drug ran out before the treatment was finished.25 Kitchen mould is a lottery anyway, because some moulds make poisons that harm the liver.26
That’s why, with no pharmacy around, what matters most is that the wound never gets infected. The order matters, though: a wound that is bleeding heavily gets stopped first, with pressure or a tourniquet as in the part on stopping bleeding, and you don’t take the pressure dressing off to wash it.7 Once the bleeding has stopped, wash a dirty wound for a long time, up to 10 minutes, with soap and water (boiled or bottled), and only then reach for an antiseptic. Don’t stitch or seal a deep, dirty wound, because a closed wound is exactly where tetanus and gas gangrene bacteria do best.27 Cover it with a sterile dressing, and if it starts bleeding heavily again, go back to pressure.
In closing
A first aid kit is one of those things you buy once and forget about for years. In my view it’s better to have a smaller one that’s up to date and that you know by heart than a huge bag full of things nobody at home knows how to use.
I’ve tried to make sure every piece of advice in this post is backed by sources. And what do you keep in your first aid kit? What do you think is missing here? Let me know in the comments.
Sources
- Safety guide (gov.pl), “Pierwsza pomoc” (in Polish): gov.pl/web/poradnikbezpieczenstwa/pierwsza-pomoc
- GOPR (Polish mountain rescue), “Co warto zabrać w góry?” (in Polish): gopr.pl/poradnik/co-warto-zabrac-w-gory
- American Red Cross, “Camping First Aid Kits, Checklist and Resource Guide”: redcross.org/take-a-class/resources/articles/camping-first-aid-kit-checklist
- CDC Yellow Book, “Travel Health Kits”: cdc.gov/yellow-book/hcp/preparing-international-travelers/travel-health-kits.html
- Safety guide (gov.pl), “Przygotuj swoje otoczenie” (in Polish): gov.pl/web/poradnikbezpieczenstwa/przygotuj-swoje-otoczenie
- American Red Cross, “Make a First Aid Kit”: redcross.org/get-help/how-to-prepare-for-emergencies/anatomy-of-a-first-aid-kit.html
- American Red Cross, “Bleeding (Life-Threatening External)”: redcross.org/take-a-class/resources/learn-first-aid/bleeding-life-threatening-external
- NHS inform, “Severe bleeding first aid”: nhsinform.scot/tests-and-treatments/first-aid/severe-bleeding-first-aid
- American Red Cross, “How to Apply a Tourniquet”: redcross.org/take-a-class/resources/articles/how-to-apply-a-tourniquet
- B. Drew et al., “Tourniquet Conversion: A Recommended Approach in the Prolonged Field Care Setting”, Journal of Special Operations Medicine, 2015: prolongedfieldcare.org (PDF)
- E. J. Koch et al., “Standardizing Tourniquet Reassessment and Conversion Across TCCC Tiers: TCCC Guidelines Proposed Change 25-2”, Journal of Special Operations Medicine, 2026: pubmed.ncbi.nlm.nih.gov/41818038
- NHS, “Cuts and grazes”: nhs.uk/conditions/cuts-and-grazes
- NHS, “Burns and scalds”: nhs.uk/conditions/burns-and-scalds
- American Red Cross, “Burns: How To Help”: redcross.org/take-a-class/resources/learn-first-aid/burns
- pacjent.gov.pl, “Jak przechowywać leki” (in Polish): pacjent.gov.pl/aktualnosc/jak-przechowywac-leki
- CDC, “Building an Emergency Kit”: cdc.gov/disability-emergency-preparedness/people-with-disabilities/build-a-kit.html
- American Red Cross, “Survival Kit Supplies”: redcross.org/get-help/how-to-prepare-for-emergencies/survival-kit-supplies.html
- American Red Cross, “Wounds”: redcross.org/take-a-class/resources/learn-first-aid/wounds
- NHS, “Hypothermia”: nhs.uk/conditions/hypothermia
- American Red Cross, “Hypothermia”: redcross.org/take-a-class/resources/learn-first-aid/hypothermia
- NHS, “Frostbite”: nhs.uk/conditions/frostbite
- NHS Healthier Together, “What to keep in your Medicine Cabinet”: healthiertogether.nhs.uk/child-under-12-years/what-to-keep-in-your-medicine-cabinet
- NHS, “Diarrhoea and vomiting”: nhs.uk/symptoms/diarrhoea-and-vomiting
- CDC, “Heat and Medications: Guidance for Clinicians”: cdc.gov/heat-health/hcp/clinical-guidance/heat-and-medications-guidance-for-clinicians.html
- H. Markel, “The real story behind penicillin”, PBS NewsHour, 2013: pbs.org/newshour/health/the-real-story-behind-the-worlds-first-antibiotic
- WHO, “Mycotoxins”: who.int/news-room/fact-sheets/detail/mycotoxins
- WHO, “Prevention and management of wound infection”: who.int (PDF)
Leave a comment