
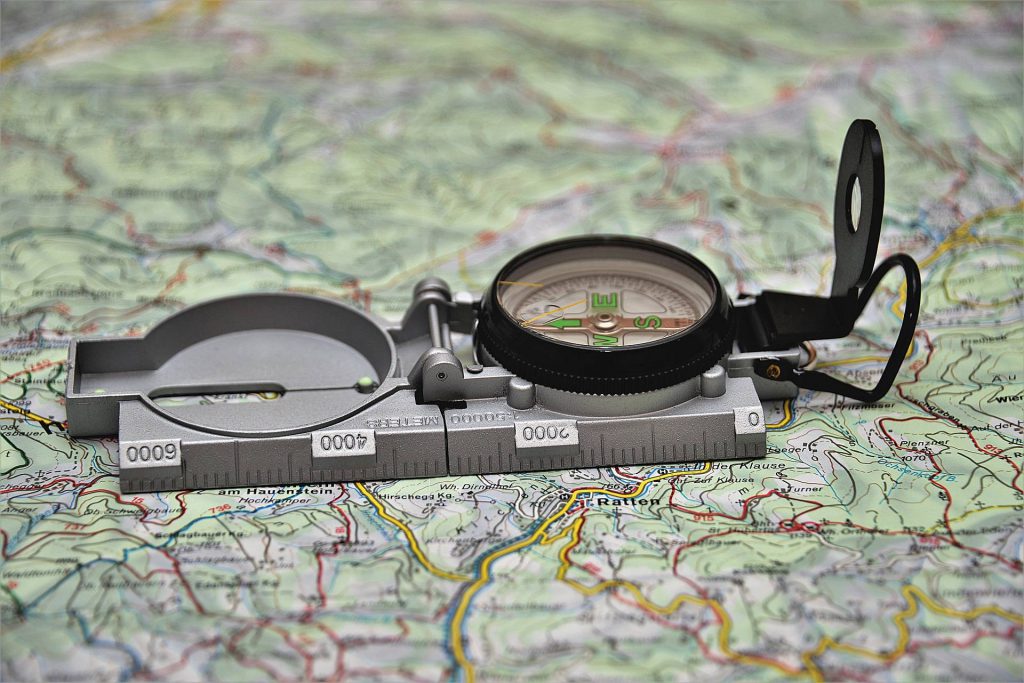
It has been known since the dawn of time that there are four basic geographical directions: east, west, north and south. These are the so-called cardinal directions. In this article you will learn a little more about the points of the compass and how to work out directions when you only have limited resources, for example when you are far away from civilisation.
In short, if you came here for a quick answer:
- N is north, S south, E east and W west (the letters are simply the initials of the English names). In Polish they are abbreviated pn., pd., wsch. and zach.
- On a map north is at the top, so east is on the right and west on the left.
- The intermediate directions combine the letters: NE north-east, SE south-east, SW south-west, NW north-west.
- Without a compass: in Poland the midday sun (around 12:00 in winter and 13:00 in summer) is in the south. Stand with your back to it and you are facing north, with east on your right. In winter it rises in the south-east, in summer in the north-east, and due east only around 21 March and 23 September.
- Watch out for a classic Polish crossword trap: W is west, not wschód, which is Polish for east 😉
You will find out how to work out directions in the field without a compass further down.
Cardinal directions
When we think of the points of the compass, our mind automatically conjures up the image of a compass with its main points marked: north, south, east and west. However, the meaning we give to these directions, and the way we understand them, can vary depending on the culture we grow up in.
The basic directions
- North (N): The direction in which the sun never rises or sets (at least in Poland - beyond the Arctic Circle the sun can rise and set almost in the north in summer, and during the polar day it shines there at midnight). Usually marked with the letter “N” on a compass. In many cultures it is regarded as a spiritual or sacred direction.
- South (S): The direction opposite north. This is where the sun stands highest in the sky at midday (in Poland around 12:00 in winter and 13:00 in summer). Marked with the letter “S” on a compass.
- East (E): The direction in which the sun rises. Traditionally associated with new beginnings and rebirth. Marked with the letter “E” on a compass.
- West (W): The direction in which the sun sets. Often associated with the close of the day or the end of a chapter. Marked with the letter “W” on a compass.
What the directions mean in different cultures
The points of the compass are not just practical reference points. In many cultures they carry a deep, symbolic meaning:
- In Chinese culture: Traditionally, east is associated with the dragon and west with the tiger. In Chinese cosmology these directions also stand for different energies and forces.
- In Native American culture: Many tribes have their own interpretations of the directions, but they are often linked to the four elements, to animals or to spirits.
- In European culture: East is often associated with knowledge and enlightenment, while west is linked with mystery and the unknown.
How do the directions affect our everyday life?
The points of the compass play a key role not only in navigation, but also in planning and designing houses, towns and gardens. Feng shui, the ancient Chinese art of harmony, uses them to optimise the flow of energy in a space.
To sum up, the points of the compass are not only a tool for finding your way around, but also an important cultural element with a deep, symbolic meaning in various traditions all over the world. To fully understand and appreciate their significance, it is worth delving into the rich history and culture of the world’s peoples.
The main geographical directions: the points of the compass in English and in Polish
Polish has its own names for the geographical directions, as you saw above, but you will often come across the international naming, which is based on English. You will find out what an azimuth is later in the text.
The table below shows all the main geographical directions in English and in Polish.
| Directions in Polish and their abbreviations | Directions in English and their abbreviations | Azimuth |
|---|---|---|
| północ, pn. | N, North | 0°(360°) |
| wschód, wsch. | E, East | 90° |
| południe, pd. | S, South | 180° |
| zachód, zach. | W, West | 270° |
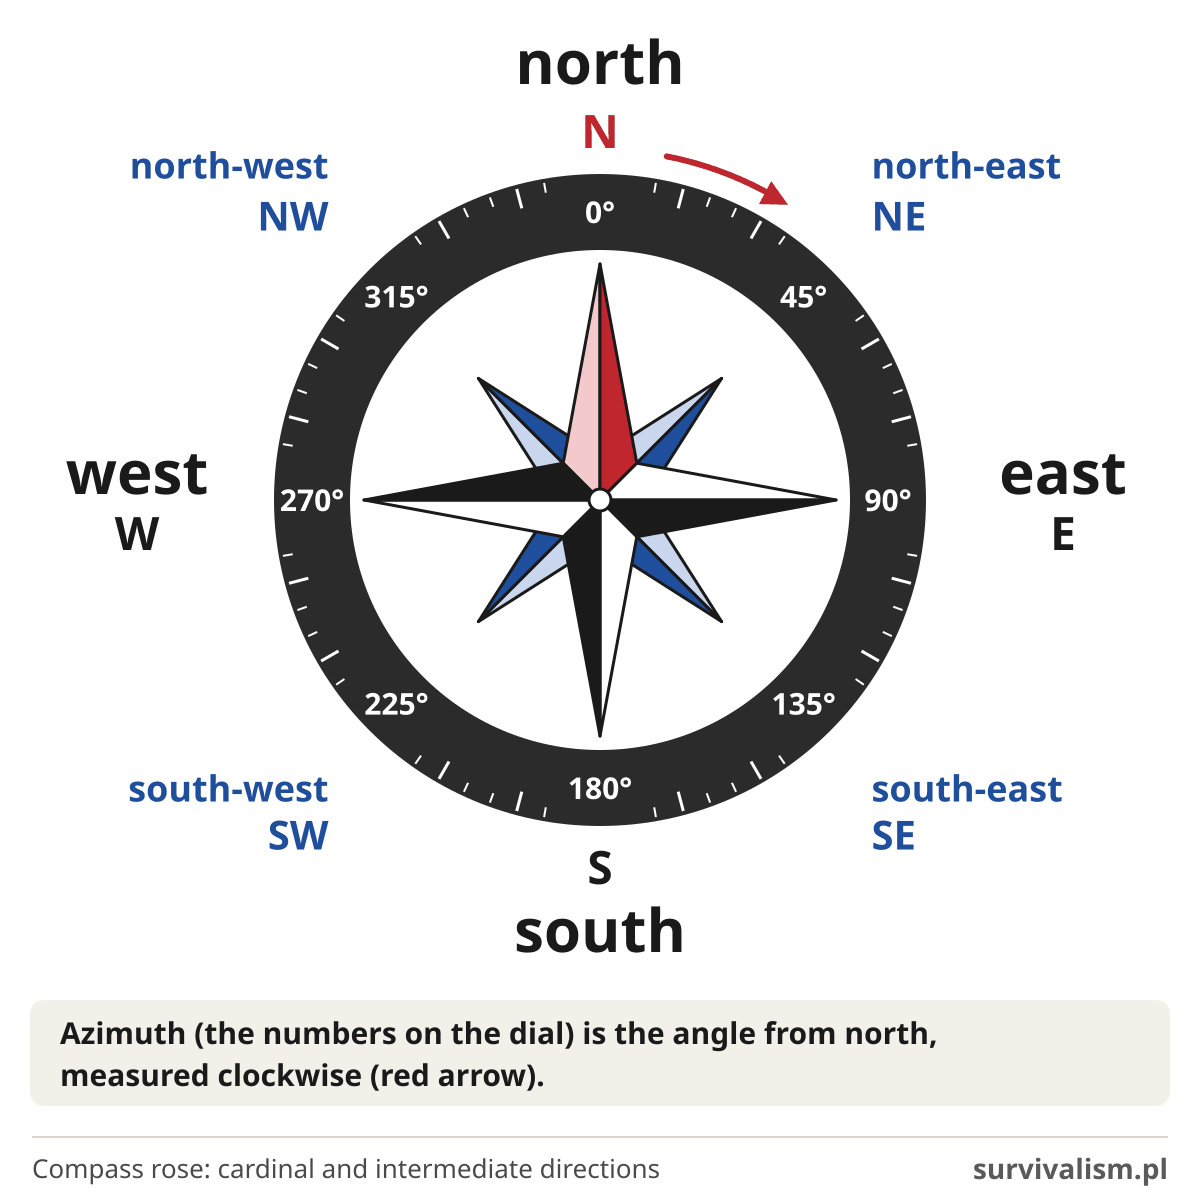
All the directions, both cardinal and intermediate, are shown on a so-called compass rose
By convention, almost all modern maps are oriented on a north-south axis, with north at the top and south at the bottom. Accordingly, the right-hand side is east and the left-hand side is west. This is not the only way of drawing maps: in medieval Europe, for example, maps were usually drawn with east at the top (hence the word “orientation”, from the Latin oriens, meaning east), and Arabic maps often had south at the top. In New Zealand and Australia you can even buy a postcard that shows the world like this:
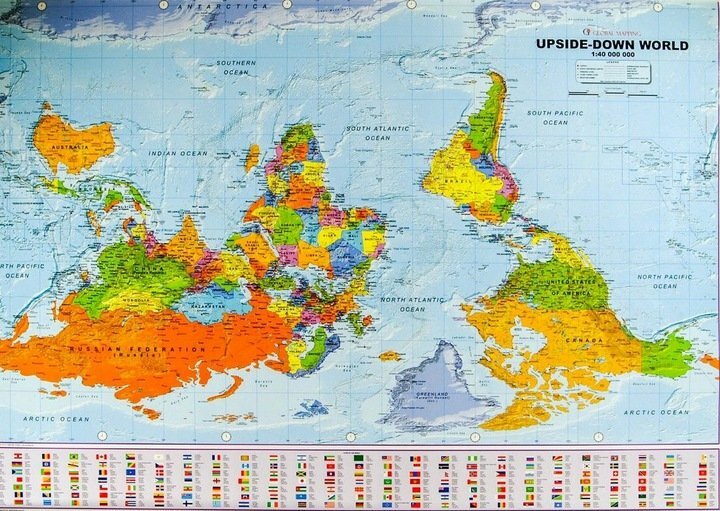
Width: 106 cm, height: 70 cm, scale: 1:40 000 000
How not to get lost? It’s simple: find north!
Finding your way in the field comes down to being able to work out geographical directions, which in practice means finding one direction and using it to work out the others. The direction we will look for most often is north. How do you check where north is and where south is? There are many ways to find north (south will, of course, be on the opposite side), but the simplest and most reliable of them is to use a compass.
We can make a primitive compass ourselves. All we need is a wine cork and an ordinary needle or a straightened safety pin. We rub one end of the needle with a magnet, always in the same direction. You will find a magnet, for example, in the tiny speaker of your headphones or in a fridge magnet. Then we push the needle through the cork and float the whole thing on water, in a plastic bowl or bucket. After a while the cork should line up on a north-south axis.
Azimuth
The azimuth is the angle between north and the direction you are walking in. We measure it clockwise. Of course, we could describe our direction in words, for example “north-east”, “south-west” and so on, but that is not precise enough. With an azimuth we can pin down our position on the map and our direction of travel more precisely.
You might think that is the end of the story. But there is quite a big catch: the compass needle points to the so-called magnetic pole. The trouble is that the magnetic pole is not fixed: it keeps shifting and “wandering”. For decades it lay in northern Canada, but today it is already in the Arctic Ocean, north of Siberia, and it moves by several dozen kilometres a year. A compass needle lines up with the lines of the Earth’s magnetic field, which run roughly towards that pole. You will have to admit that a reference point which keeps shifting and “wandering” around the map is not much use for working out geographical directions precisely.
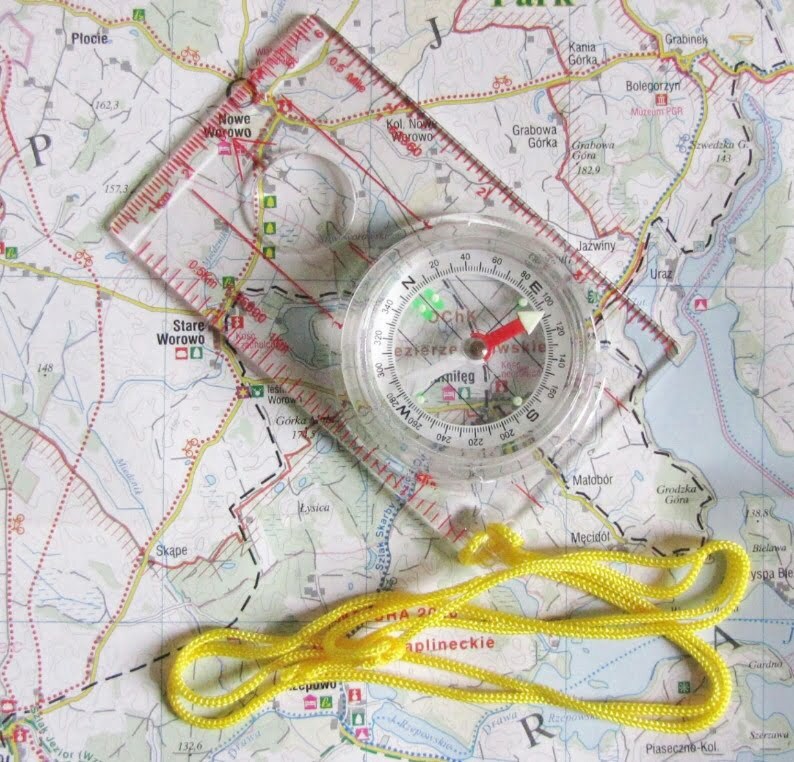 Amazon store, affiliate link, opens in a new tab
Cartographers noticed this problem too, which is why they established the so-called true north, which lies exactly at the geographic North Pole. Maps are oriented to it (on topographic maps the kilometre grid lines can deviate from it by a few degrees - this difference, called grid convergence, is given in the notes in the map margin). True north is always in the same place on the map, so you can rely on it.
So remember that the direction shown by a compass is not exact geographical north, and that the error depends on where you take the reading and on the current position of magnetic north. This error, called declination, differs from place to place around the world: in Poland it is a few degrees east, and near the magnetic poles it reaches tens of degrees.
However, you may find yourself taking a reading while standing between magnetic north and true north. In that situation the compass becomes practically useless. Unless, that is, we know the size of the error, the so-called magnetic declination, also known as magnetic variation.
Every good topographic map should give the declination for the year it was published and its annual change (on an older map you have to recalculate it). If you do not know its value, you can use the NOAA declination calculator.
For example, in Rzeszów (a city in south-eastern Poland), when the first version of this article was being written, the declination was +5° 55’, and in September 2026 it was already about +6° 48’ (it grows by about 0.1° a year).
Magnetic declination is not something to brush aside. Even a small three-degree magnetic declination means a gap between geographical and magnetic north of around 50 m for every kilometre you cover. Quite a lot.
Another important thing to bear in mind when using a compass is magnetic anomalies of various kinds. A compass usually shows magnetic north, but sometimes its reading is wrong.
Such an error can be caused, for example, by a metal object near the compass. That is why you should pay special attention to this when taking a compass reading: do you have a metal canteen or a machete clipped to your belt? Or perhaps your favourite camera is hanging round your neck?
A compass can also be thrown off by natural anomalies. Some iron-rich rocks can deflect the needle. Man-made structures can also cause reading errors. Check whether there are underground sewer pipes, high-voltage power lines, railway tracks or similar structures near the spot where you take the reading.
When walking on a bearing (a topic that is far from trivial), check your compass readings regularly. Not everyone realises that without reference points people cannot walk in a straight line: in a 2009 study, participants walking through a forest under an overcast sky walked in circles, while with the sun visible they walked almost straight.
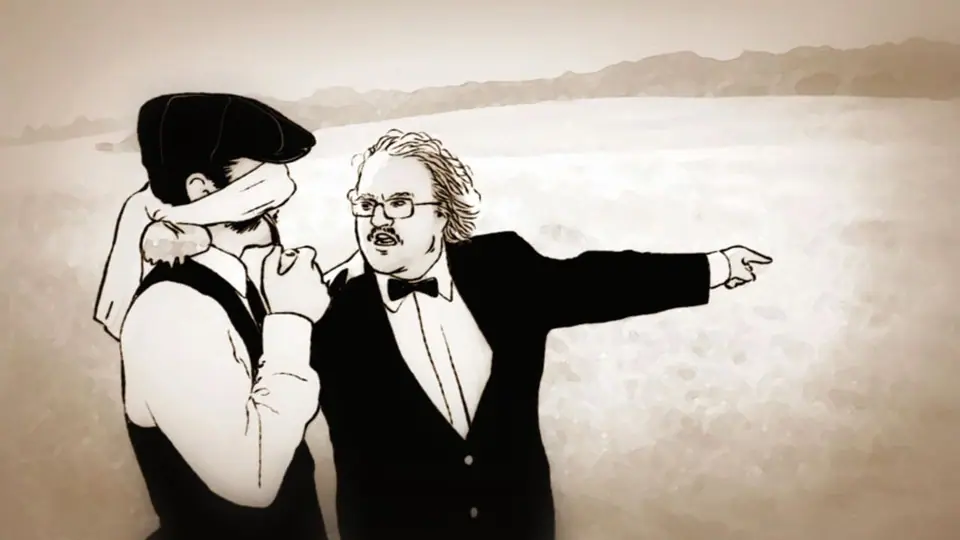
The best way to deal with this is to pick a distinctive landmark that will set your direction for that stretch of the route. A hilltop, a tall building, a group of rocks or even a broken tree will do. When we reach it, we look at the compass and the map, look around and find the next landmark. Then we repeat the process. Moving this way keeps the risk of getting lost to a minimum.
Compass and sighting compass
I have already mentioned the compass. Some people insist on distinguishing between a compass and a sighting compass (Polish has two separate words for them, kompas and busola). Personally, I don’t think the distinction is justified. A sighting compass is simply a slightly more sophisticated compass - one with a scale and a rotating dial. In everyday language the difference between the two gets blurred. It is like mass and weight: to a physicist they are two different physical properties, yet in everyday speech the two words are used interchangeably. The same goes for the compass and the sighting compass, so for the purposes of this text I will not distinguish between them.
Any well-made compass will do for field use. It is good if its needle sits in liquid. This reduces the shaking and swinging of the needle when you read the direction. It is worth choosing a compass with a rotating graduated dial (a so-called baseplate compass) - cheap button compasses do not have one. This scale lets us determine the azimuth and makes accurate navigation in the field much easier.
In desert and wilderness
But what do you do when you are in unfamiliar terrain and have no compass? Fortunately, we can easily make one ourselves. I mentioned one way of doing it earlier, but in the field we may have to improvise more.
North and south: a compass made from wire
To make a simple compass we will need a metal needle, one that can be magnetised. Aluminium or copper, for example, will not work, so first make sure the metal is magnetic. You magnetise the needle by rubbing it with a magnet. Remember to keep rubbing in one direction only.
If we have no needle, we will have to improvise. Think about where you could get a piece of straight steel wire. A safety pin, a paper clip or a razor blade, perhaps? Check that it sticks to a magnet. As for the magnet itself, you can take one, for example, from the tiny speaker in the headphones you have in your pocket. In a situation like this you have to be resourceful.
Place the magnetised needle on something that floats, such as a piece of leaf, paper or a thin sliver of bark. Our floating platform should not be too heavy. Also make sure that the surface of the water is fairly still. A puddle is best for this. Its depth does not matter, as long as our device floats freely on the surface.
After a few moments the floating needle should line up on a north-south axis. To tell which end points north and which south, remember that before solar noon (in Poland about 11:15-12:00 in winter and about 12:20-13:10 in summer) the sun is in the eastern part of the sky, and after it, in the western part.
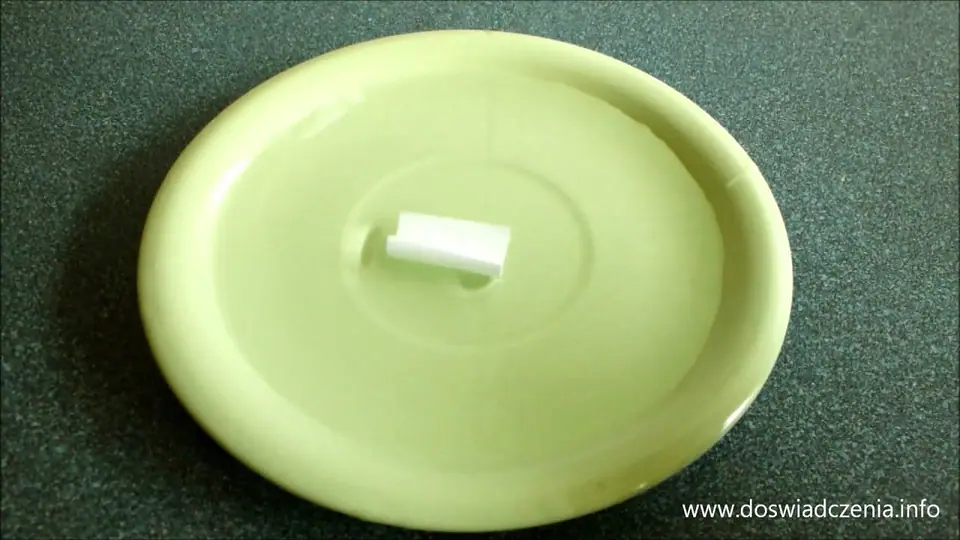
After a while the needle loses its magnetism, so you will need to magnetise it again every so often.
East and west - so where does the sun really rise and set?
The names of the geographical directions east and west, as you have probably guessed, are linked to sunrise and sunset. Intuition tells us that these are the places where the sun rises and sets, which sounds logical.
But, contrary to intuition, things are not that simple here. In fact, the sun rises due east and sets due west only twice a year! To be specific, this happens at the spring and autumn equinoxes (and for a few days around them). Without going into detail, it is down to the tilt of the Earth’s axis (by about 23.4°, i.e. at an angle of about 66.6° to the plane of its orbit) and the Earth’s movement around the Sun. In Poland, in June the sun rises as much as about 40° further north, in the north-east, and in December the same amount further south, in the south-east.
So you can find the exact east-west axis from the Sun only twice a year: on 20/21 March (the spring equinox) and on 22/23 September (the autumn equinox). The further you are from these dates, the bigger the error.
So remember that in most cases you cannot rely on sunrise and sunset to find the east-west axis.
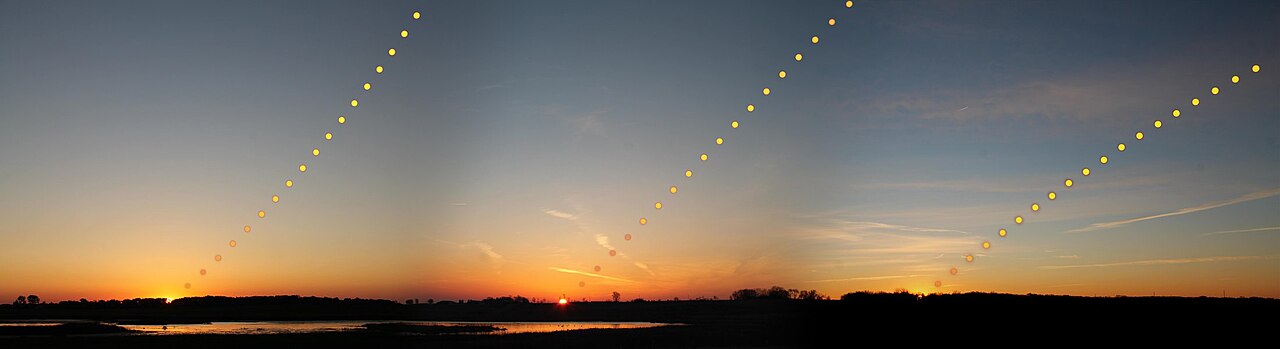
Photo courtesy of: LynceanEducation, licence CC BY-SA 4.0, Wikimedia Commons
How not to perish: other ways of finding north without a compass
I mentioned earlier that the sun does not rise in the east or set in the west. This is a particularly important point, especially for beginner survivalists heading out into the field for the first time, for example into the mountains. There are, however, ways in which we can use the sun to find geographical north fairly precisely.
East, west and the shadow-stick method
This is a very simple and very effective method that works practically anywhere the sun shines.
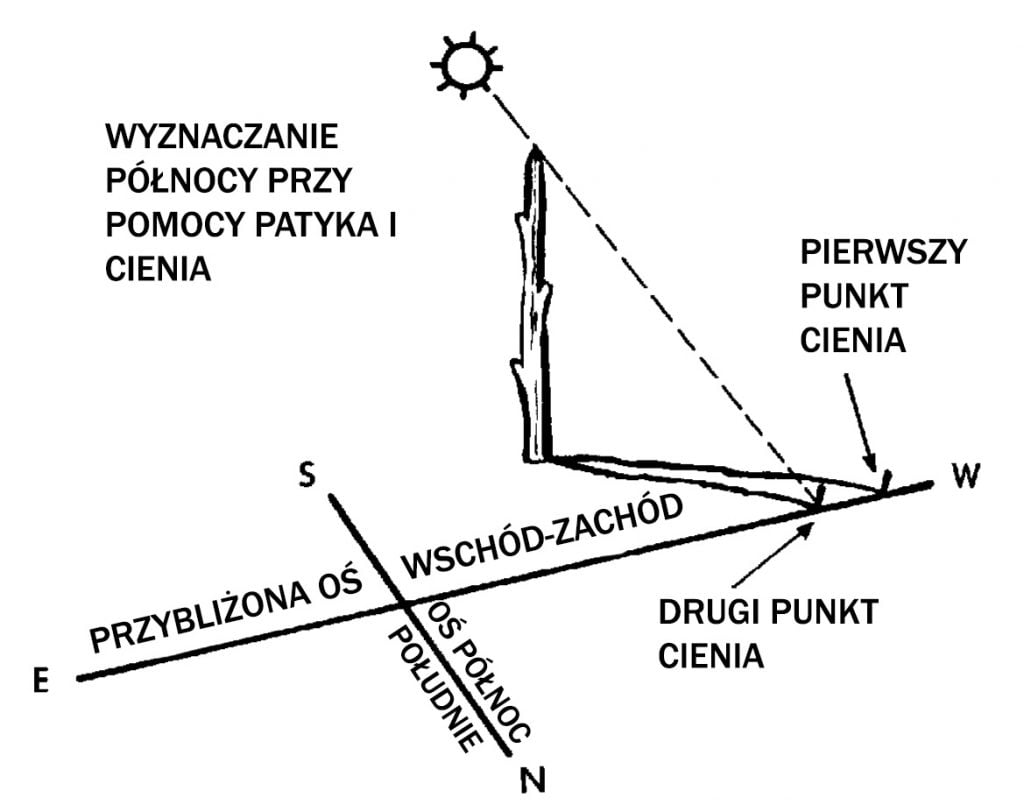
- Push a stick into the ground and mark the tip of its shadow with a stone.
- Wait ten to fifteen minutes. In that time the shadow will move a little.
- Put a second stone at the tip of the shadow. This gives you a straight line between the two stones, running east-west.
- Stand with your left foot on the first stone (west) and your right foot on the second (east). You are now facing north. This works anywhere on Earth.
Finding north with the Pole Star (in the northern hemisphere)
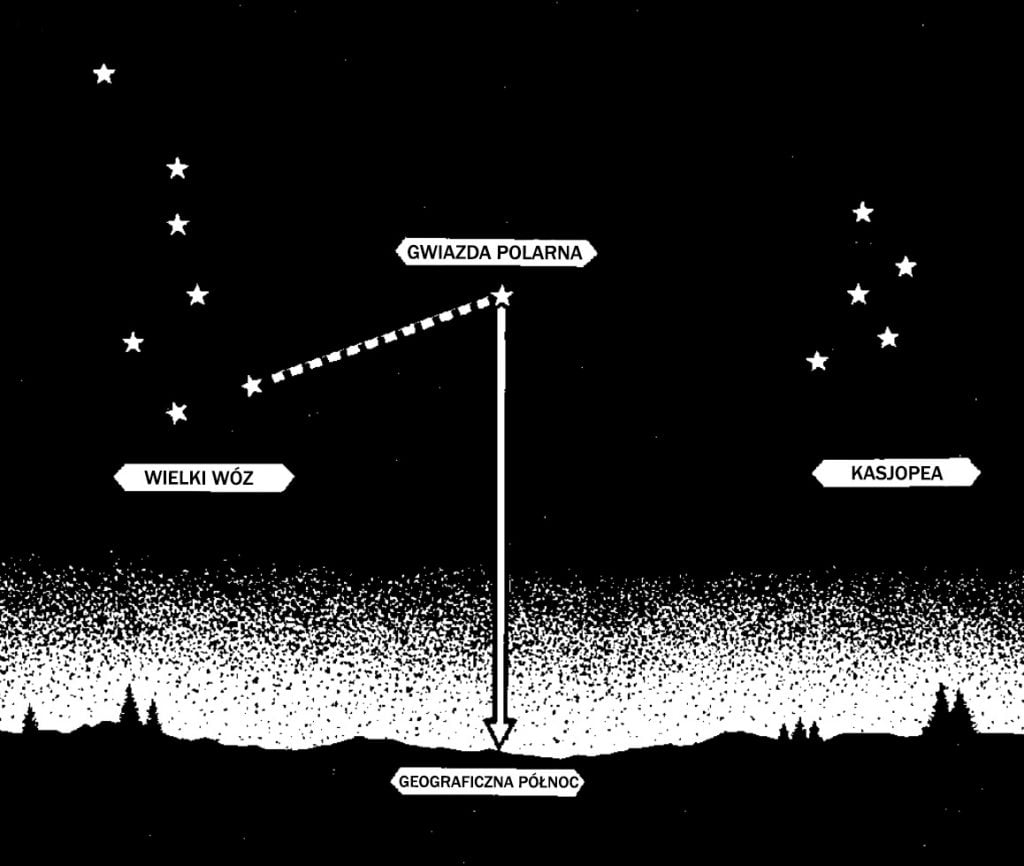
We start by finding the Pole Star in the sky. We do this by finding the distinctive constellation of the Plough (the Big Dipper). The two stars that form the back wall of the Plough’s “box” (on the side away from the handle) make a line segment - measure it out about five times in the direction the box opens and you will reach the Pole Star. Now all we need to do is pick a landmark directly beneath it, and we have our north.
The watch method (in the northern hemisphere)
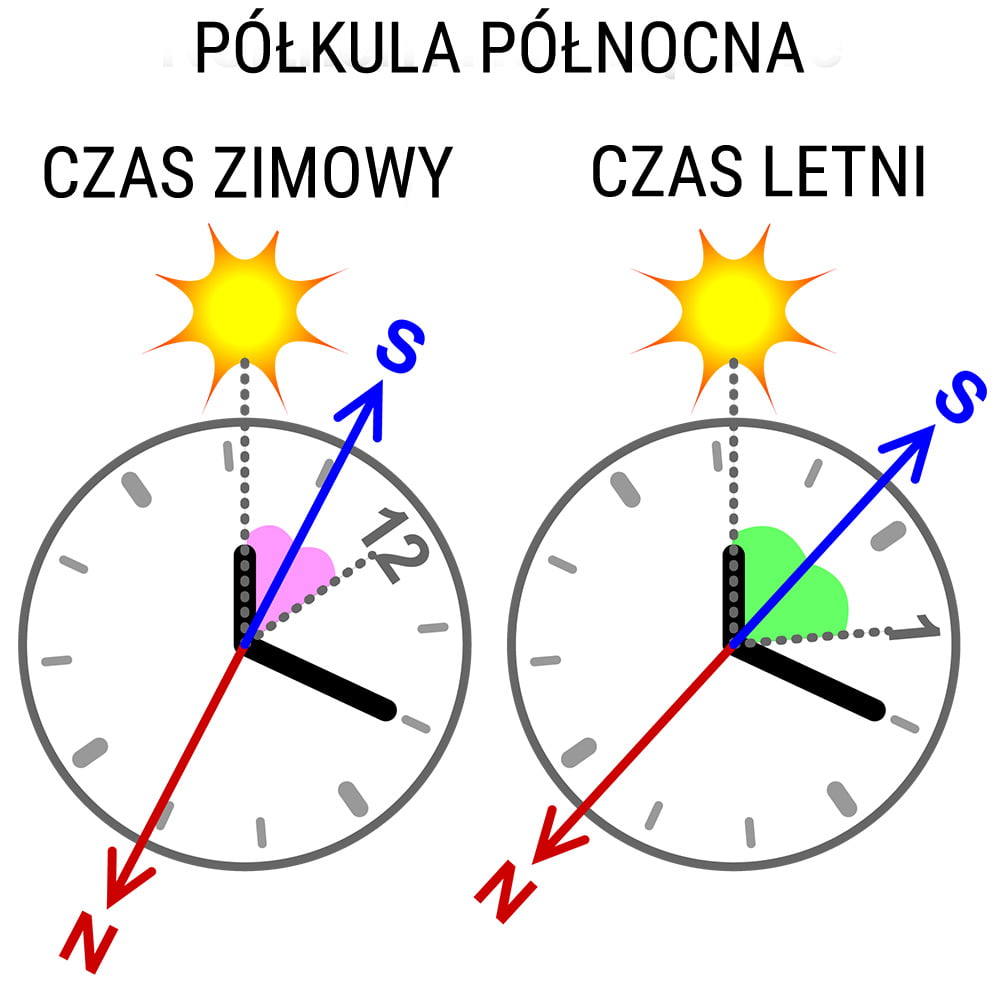
If we have an analogue watch that shows the correct time, we can use it to find north.
- Lay the watch flat on your hand or on some other flat surface.
- Then point the hour hand at the sun.
- Now the line halfway between the hour hand and 12 o’clock on the dial points south. North, of course, is on the opposite side. This is an approximate method: in Poland in summer, when the sun is high, it can be out by as much as 25-30°, while in winter it is more accurate.
Moss, ants and the like
In many handbooks you will come across claims that moss grows on one particular side of rocks, that tree rings are laid down one way or another, or that anthills slope more steeply on the north side.
Well, personally I think this way of finding direction can do more harm than good. Moss simply grows in the shade, and that is not necessarily the north side. Tree rings are sometimes laid down quite randomly, so that is another misleading method. I would not rely on moss, tree rings or anthills under any circumstances.
The methods I have described above should be quite enough to find geographical north fairly accurately; there is no need to resort to inspecting moss on rocks.
What should you do if you get lost?
All the methods described above are only any use if you keep calm. If you realise you do not know where you are, do not carry on blindly. That is the easiest way to end up even further from the trail.
- Stop and try to remember where you last knew for sure where you were.
- Check your phone. GPS works even without mobile signal, and a map you saved earlier for offline use will show you where you are. Save your battery.
- Call for help if you do not know how to get back or darkness is coming: the emergency number is 112, and in the mountains the number of GOPR and TOPR, the Polish mountain rescue services, is 985 or 601 100 300. It is also worth having the free Ratunek (Rescue) app on your phone, which sends your location to the rescuers when you call for help.
- Stay put if someone knows your route and when you are due back. Rescuers find it much easier to locate someone who is not moving.
And before you even set off, tell someone where you are going and when you plan to be back. It is the simplest thing that could save your life.
A summary of sorts
This is where I will end the text, although I realise that the subject is vast and I have certainly not exhausted it. I am planning more material on the subject, starting with walking on a bearing.
If you have any comments on the text, have spotted a mistake, or just want to say “hi”, feel free to leave a comment.
Leave a comment